At Lightspan we’re always experimenting with new tools to make the most efficient use of our time on social media. Some work out great, some we quickly discard, and others we cherry-pick for uses we like. Despite the promises of every social tech startup you’ll stumble across, we can tell you there is no all-in-one solution to do everything you want.
However, one of the tools we have come to like is Sendible, particularly the bulk scheduling feature. You can bulk schedule posts for Twitter, Facebook, Google+, LinkedIn, and much more on the platform. Today Tamara gives you an easy how-to lesson on the Sendible bulk scheduling platform.
How to Bulk Schedule Social Posts With Sendible
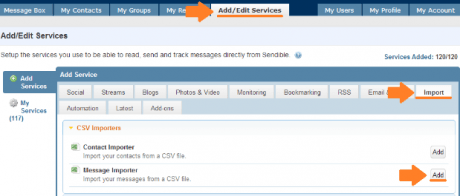
Step 1: Go to “Add/Edit Services”, choose “Import”, and then click the “Add” button for “Message Importer”.
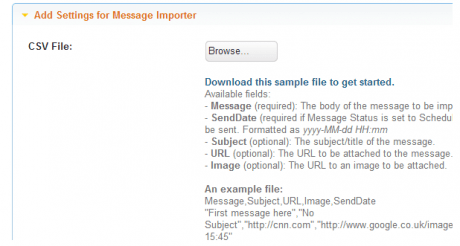
Step 2: Download the sample file by clicking “Download this sample file to get started.”
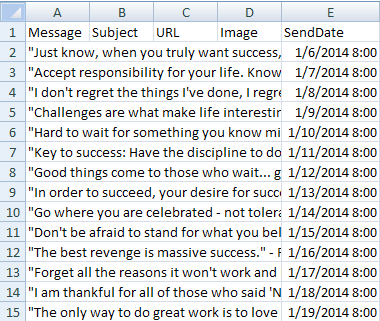
Step 3: Create your messages in Excel.
Message (required): The body of the message to be imported. NOTE: Use this <” “> not this <“ ”>.
SendDate (required): The date the message should be sent.
Subject (optional): The subject/title of the message.
URL (optional): The URL to be attached to the message.
Image (optional): The URL to an image to be attached.
Using the “sample file”, I created 14 messages to be scheduled every day starting 1/6/2014 at 8:00:00 AM. If you don’t want to add “Subject”, “URL”, or “Image” just leave them blank.
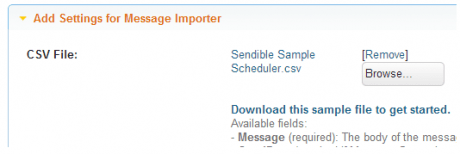
Step 4: Upload your file
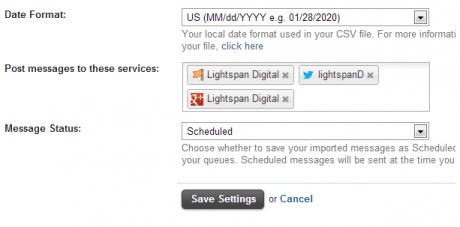
Step 5: Check the date format, choose your Social Media Accounts, set as “Scheduled” and finally… click “Save Settings”.
You can choose multiple social accounts to post your messages >> Twitter, Facebook, Google+, LinkedIn, and more.
Now your set with a slate of messages scheduled to hit people at the best times!

Leave a Reply